No Data? No Problem!
Generate realistic mock data for your MySQL database with Node.js.
Introduction:
Interested in generating mock data to work within your MySQL database? What if you could generate thousands of entries of realistic mock data including names, email addresses, street addresses, business occupations, phone numbers and much more? With the help of Node.js package, faker.js, realistic data can be generated with a few lines of code and then inserted into your MySQL table(s). This post explains step by step how to get started by first connecting Node.js to MySQL.
Connect Node.js to MySQL
Before you begin, make sure to have MySQL installed on your computer. You can download MySQL using the following link.
Step 1: Create a new Node.js project
As with any new Node.js project, it’s important to create a new directory and initialize it using the npm init function. Open up your terminal and run the following.
mkdir node_js_DB && cd node_js_DB
npm init --y
Step 2: Install mysql and faker node modules
The mysql module connects Node.js to MySQL while faker generates mock data. Both will be used in conjuction to generate mock data and insert into MySQL table(s). Learn more about the mysql module here. In your terminal, copy/paste the code below and run.
npm install --save mysql
npm install --save faker
Step 3: Connect with MySQL
Within the same directory, create an app.js file and copy/paste the code below. Make sure to adjust the code below to account for your MySQL credentials.
var db = require('mysql');
var faker = require('faker');

var conn = db.createConnection({
  host: "localhost",
  user: "root",
  password: "password",
  database: "database_name"
});

conn.connect(function(err) {
  if (err) throw err;
  console.log("Connected!");
});

conn.end();
Once the code has been copied/pasted and the MySQL server credentials have been updated, run the code in your terminal using the following command.
node app.js
Your terminal should say ‘Connected!’ once a connection has been established.
Troubleshooting
It’s possible you may recieve the following error message if you have the latest MySQL server install.
{
  code: 'ER_NOT_SUPPORTED_AUTH_MODE',
  errno: 1251,
  sqlMessage: 'Client does not support authentication protocol requested by server; consider upgrading MySQL client',
  sqlState: '08004',
  fatal: true
}
To remove this error, simply create a new user in your MySQL server with ‘mysql_native_password’ authentication. First, log onto the MySQL server using root access.
mysql -u root -p
Run the following command.
ALTER USER 'root'@'localhost' IDENTIFIED WITH mysql_native_password BY 'password'
Once the new credentials have been updated, node.js should be connected to your MySQL database.
Create MySQL Table
Before we begin generating mock data, we will have to create a data table within the database specified in the app.js file to store the mock data. Navigate to your respective MySQL database and use the following code to create a table called “users”.
To keep this example simple, we will add the following: id**, **first name, *last name, email, and created_at. We will use id as the Primary Key for this table and designate it as an INTEGER type. Next, first_name, last_name, and email will be VARCHAR data that cannot have NULL values. Lastly, created_at will be designated as a TIMESTAMP type with DEFAULT set to NOW() in the absence of data.
Copy/paste and run the following code within your MySQL server.
CREATE TABLE users (
    id INTEGER AUTO_INCREMENT PRIMARY KEY,
    first_name VARCHAR(255) NOT NULL,
    last_name VARCHAR(255) NOT NULL,
    email VARCHAR(255) NOT NULL,
    created_at TIMESTAMP DEFAULT NOW()
);
Generate Mock Data
Now that our table has been created in MySQL, let’s return to our app.js file and add the necessary code to generate and insert mock data into our users table.
We will create 500 entries of mock data using a for loop, however, you can adjust the code and increase/decrease the number of total entries. The mock data will be stored in an array called data. Within the array data, we will store further arrays as each entry will include multiple data entries (first_name, last_name, etc.).
Copy/paste the following code below your db.createConnection(); code.
var data = [];
for(var i = 0; i < 500; i++){ // Adjust # to +/- # of entries
    data.push([
        faker.name.firstName(),
        faker.name.lastName(),
        faker.internet.email(),
        faker.date.past()
    ]);
};
Insert Data into MySQL Table
The next step is to insert the mock data into our MySQL table. Let’s do this by creating a variable to store the MySQL query that will be used within the app.js file. Make sure the name of the table you are inserting the data in matches the table within the database you connected to earlier.
Copy/paste the following code below the previous code.
var q = 'INSERT INTO users (first_name, last_name, email, created_at) VALUES ?';
The final step is to insert the data using the conn.query() function. Create a function to verify whether the data insertion was successful or not by returning either an error or the result.
Copy/paste the following code below the previous code.
conn.query(q, [data], function(err, result) {
  console.log(err);
  console.log(result);
});
Next, let’s comment out the following code from the initial set up as it is no longer necessary.
//conn.connect(function(err) {
//  if (err) throw err;
//  console.log("Connected!");
//});
Final Code
Your final app.js code should look like the following:
var db = require('mysql');
var faker = require('faker');

var conn = db.createConnection({
  host: "localhost",
  user: "root",
  password: "password",
  database: "database_name"
});

var data = [];
for(var i = 0; i < 500; i++){
    data.push([
        faker.name.firstName(),
        faker.name.lastName(),
        faker.internet.email(),
        faker.date.past()
    ]);
};

var q = 'INSERT INTO users (first_name, last_name, email, created_at) VALUES ?';

conn.query(q, [data], function(err, result) {
  console.log(err);
  console.log(result);
});

//conn.connect(function(err) {
//  if (err) throw err;
//  console.log("Connected!");
//});

conn.end();
Go ahead and save the file. Once you’re ready, open up your terminal to the file directory and run the app.js file with the following.
node app.js
Successful Insertion
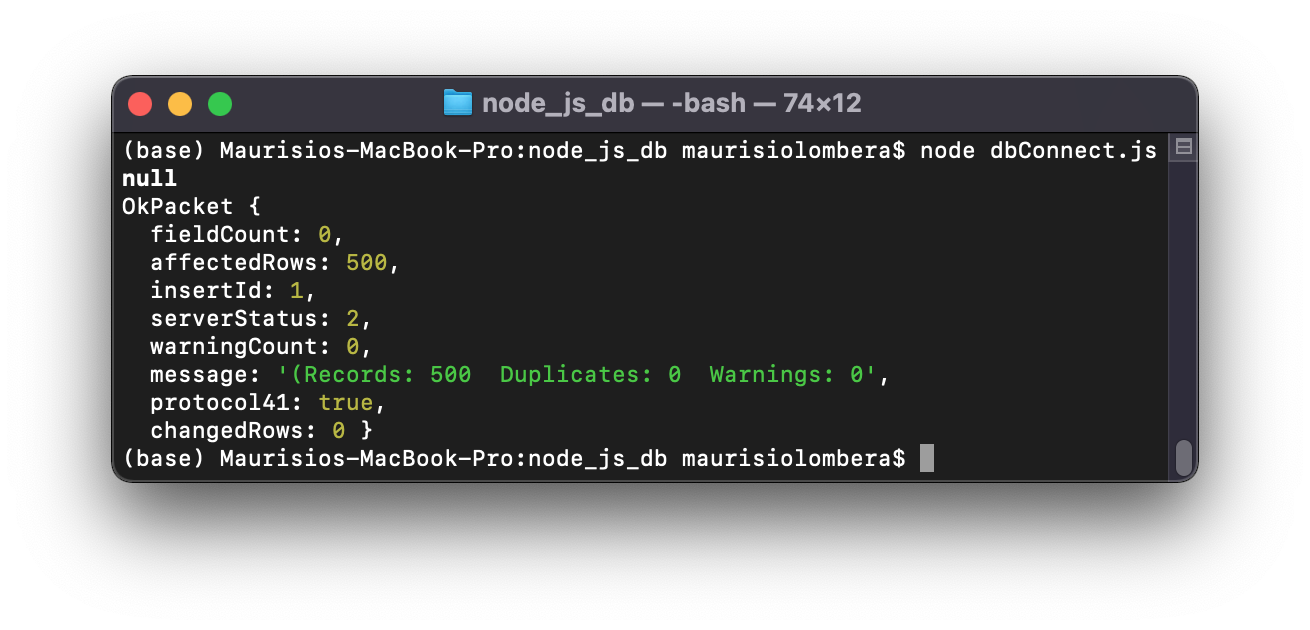
You should see something similar if your mock data insertion was successful.

- Note the node.js filename used is different
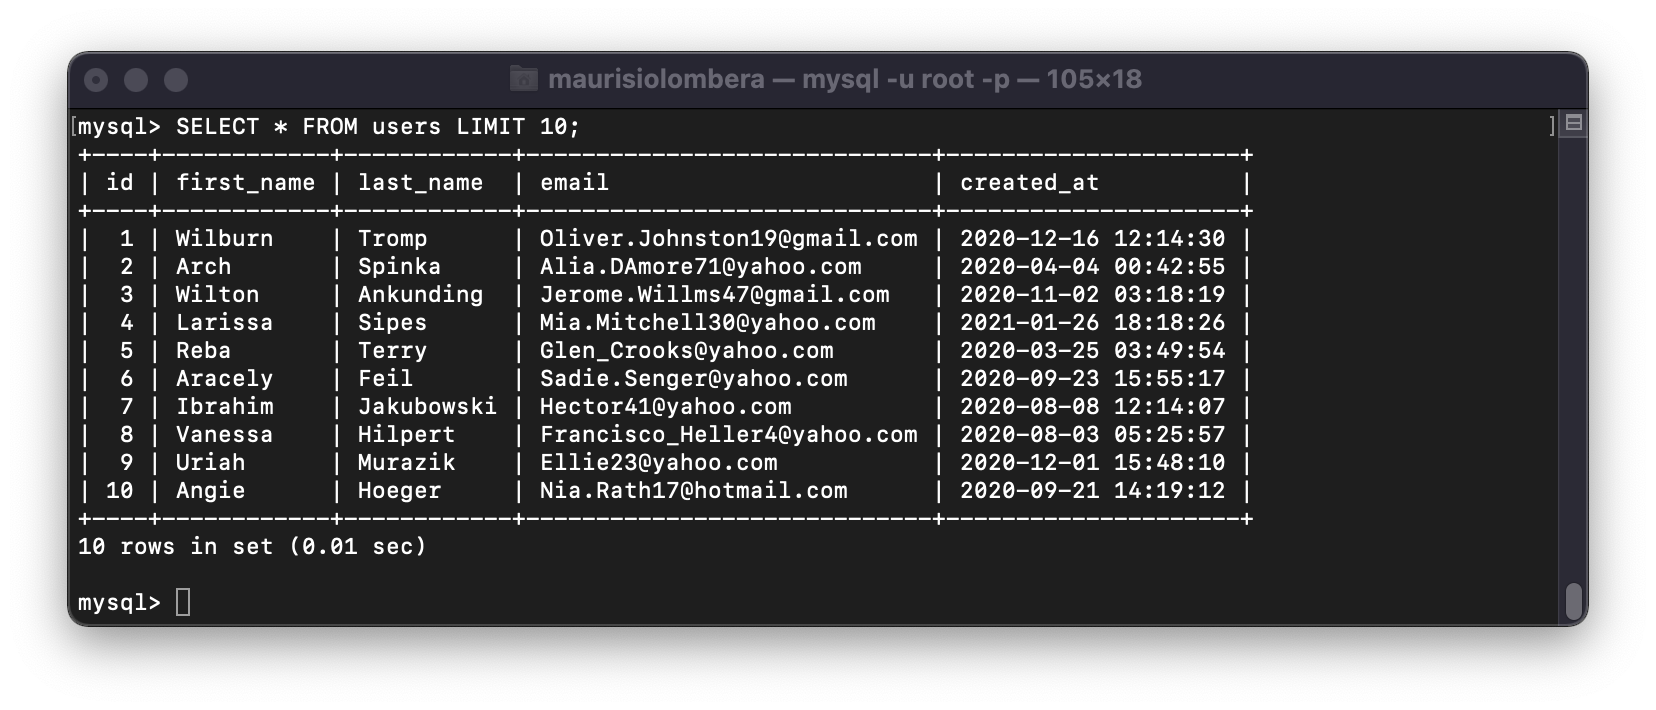
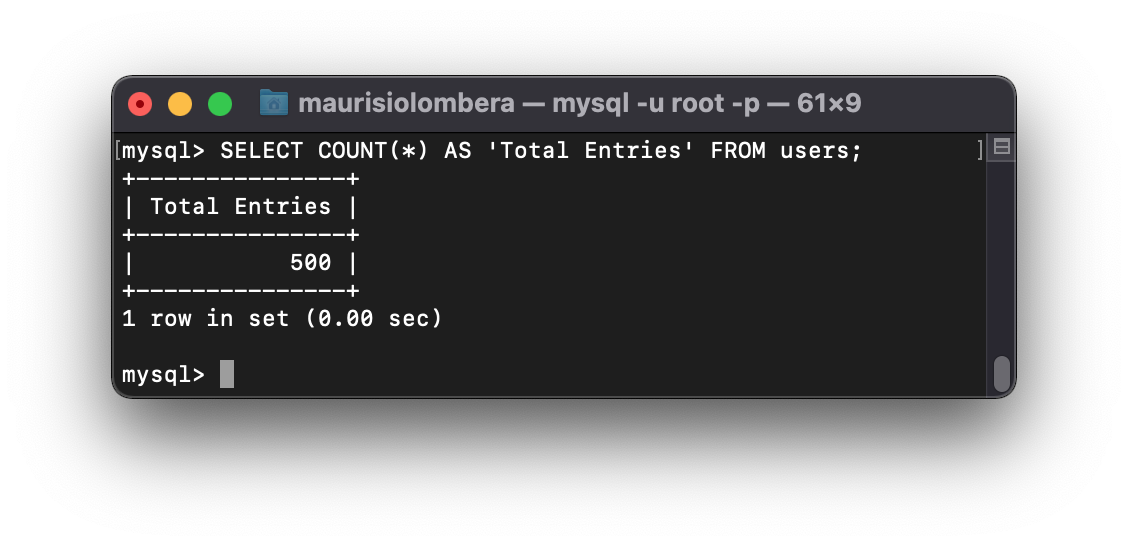
Double check our data insertion was successful by querying data from the users table.


Conclusion
Using Node.js, we learned how to quickly set up a connection between node.js and our MySQL server. Once connected, we used the faker.js and mysql.js packages to create mock data and insert realistic data into a table within our database. The possibilities are endless as faker.js provies various functions to create different types of mock data including account numbers, addresses, credit card numbers and much more!
